

Structuring NextJS projects

Full-stack Javascript Developer
Coming from a React.js world, learning Next.js is fun. There are many features in Next.js, but today we will discuss file-based routing in Next.js. I really like file-based routing. There is no need to add any extra packages and configure it. Just create a folder and a bunch of predefined files (page.tsx, layout.tsx) in the app directory, or simply create a file in the pages directory, and you get what you want. So, in this tutorial, let's explore how you can organize your files and structure your project in a way that won't overwhelm you when you're working on a large codebase. Let's dive into it.
1. Create NextJS Project
Let's create a new NextJS project first
pnpm create next-app
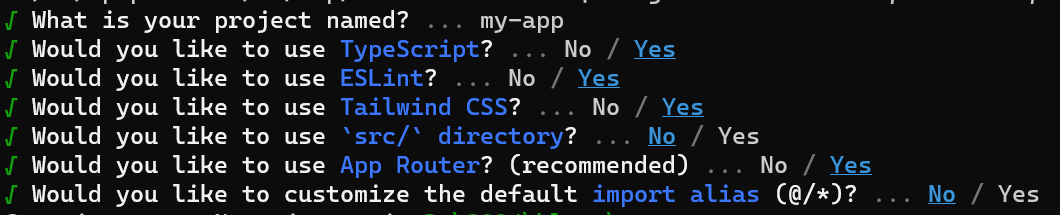
PS: We are using App Router and Typescript in this tutorial
Your NextJS project is ready for experiment.
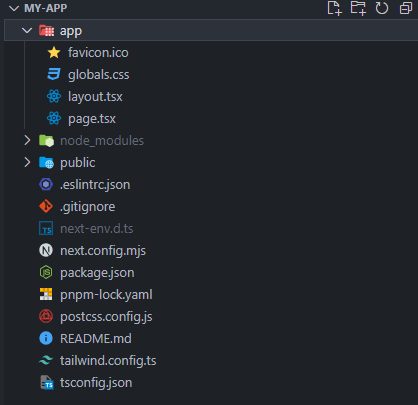
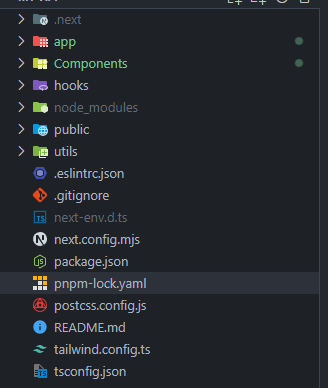
We can see that within my-app there are 3 top-level folders (node_modules, public, app).
node_modules - node_modules manage your packages
public - public folder used for serving static assets like favicon, icons, sitemap zip files, etc
app - This is the place where all magic happens. Let's understand
2. Routing Fundamental in Nextjs
You can see the layout.tsx and page.tsx files in the app folder.
layout.tsx file is the UI that is shared between routes. It is used to wrap multiple pages/routes to provide a consistent layout structure across different parts of the application.
Here I have created a simple navbar above the children props.
 export default function RootLayout({
   children,
 }: Readonly<{
   children: React.ReactNode;
 }>) {
   return (
     <html lang="en">
       <body className={inter.className}>
         <nav className="bg-gray-400 py-3 px-6">
           <p className="text-2xl font-bold"> Developer Logs</p>
         </nav>
         {children}
       </body>
     </html>
   );
 }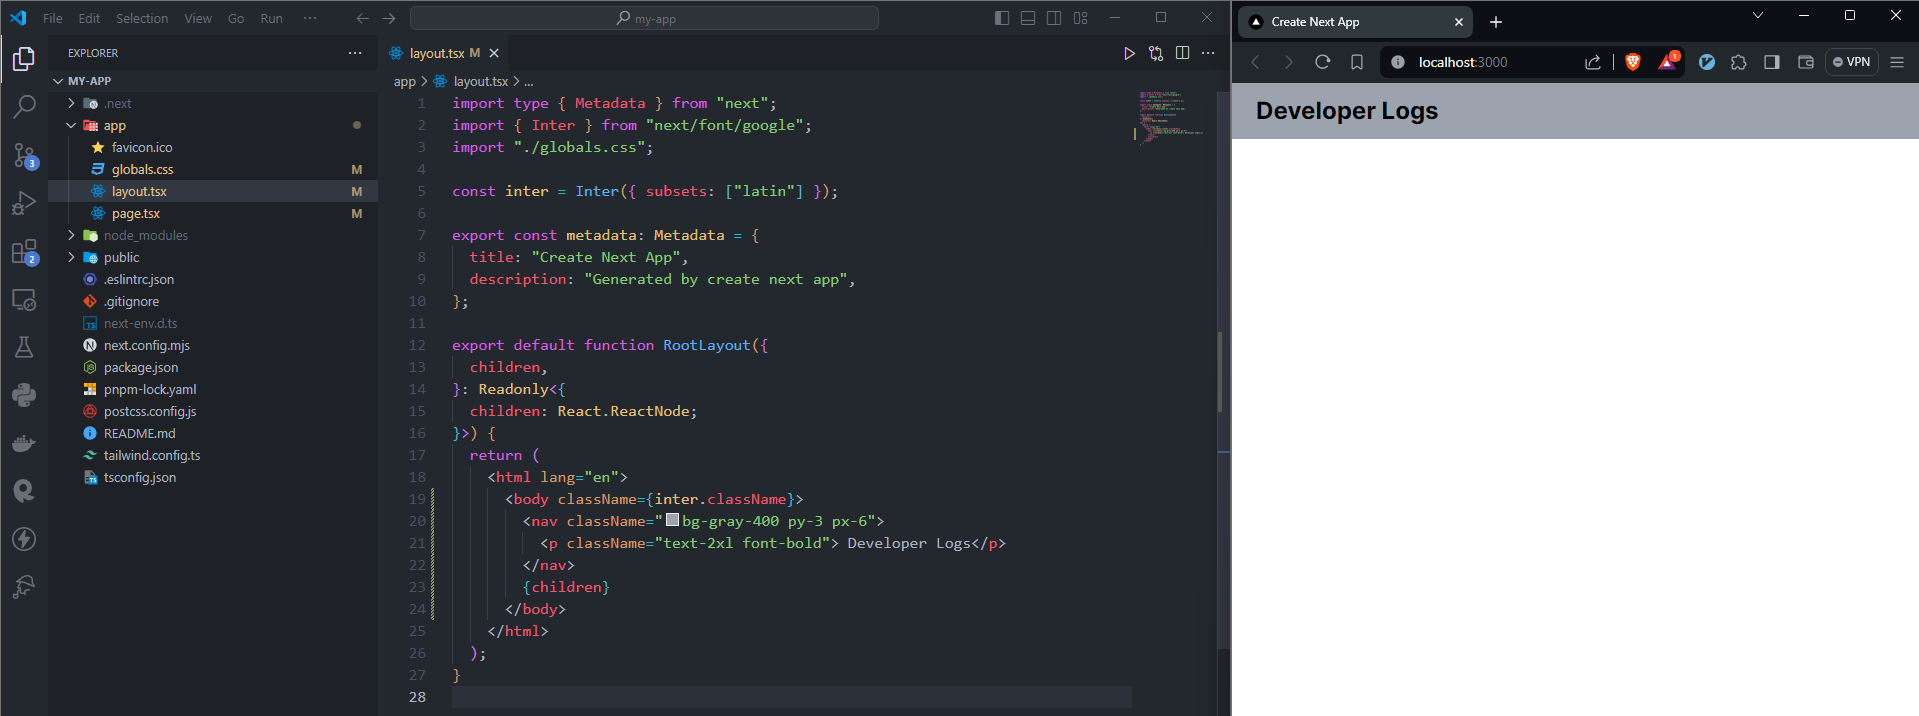
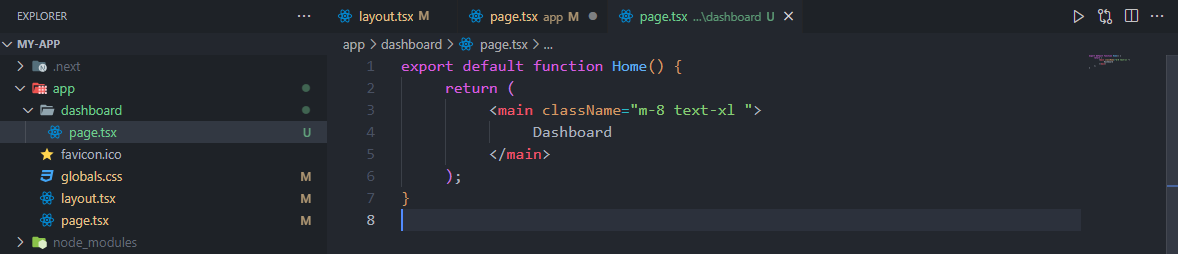
page.tsx file is unique to a route. For instance, if we create a new folder within the app folder, such as the dashboard. The dashboard folder requires a page.tsx file. page.tsx render out your JSX code into /dashboard url and layout.tsx shared in /dashboard URL.
Let's go step by step
First, create a button in the root page.tsx which redirects the users to the dashboard.
 import Link from "next/link";
 export default function Home() {
   return (
     <main className="m-8">
       <button className="text-xl border-b-2 border-black cursor-pointer">
         <Link href={'/dashboard'}>
           Go to Dashboard
         </Link>
       </button>
     </main>
   );
 }
Now create a folder dashboard and within the dashboard folder create page.tsx file.
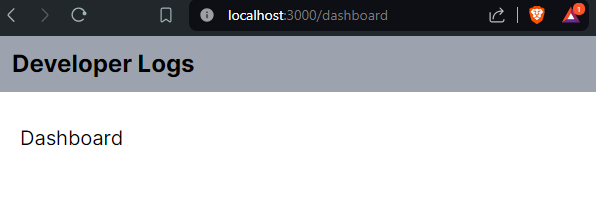
Now if you click on Go to Dashboard cta, url changes to localhost:3000/dashboard and you can see, the content of the dashboard with a shared navbar.
If you want a different layout in the dashboard route, different from the root layout, you can create a new layout.tsx file within the Dashboard folder. This layout.tsx UI shared across the dashboard route. Let's create a sidebar in the dashboard's layout.tsx file.
 import Link from "next/link";
 export default function DashboardLayout({
      children,
 }: Readonly<{
      children: React.ReactNode;
 }>) {
      return (
           <section className="flex">
                <nav className="h-screen w-1/4 bg-gray-300 p-4">
                     <ul>
                          <li className="mb-4">
                               <Link href="/dashboard/blog/123">
                                    <p className="font-semibold">Blog</p>
                               </Link>
                          </li>
                     </ul>
                </nav>
                {children}
           </section>
      );
 }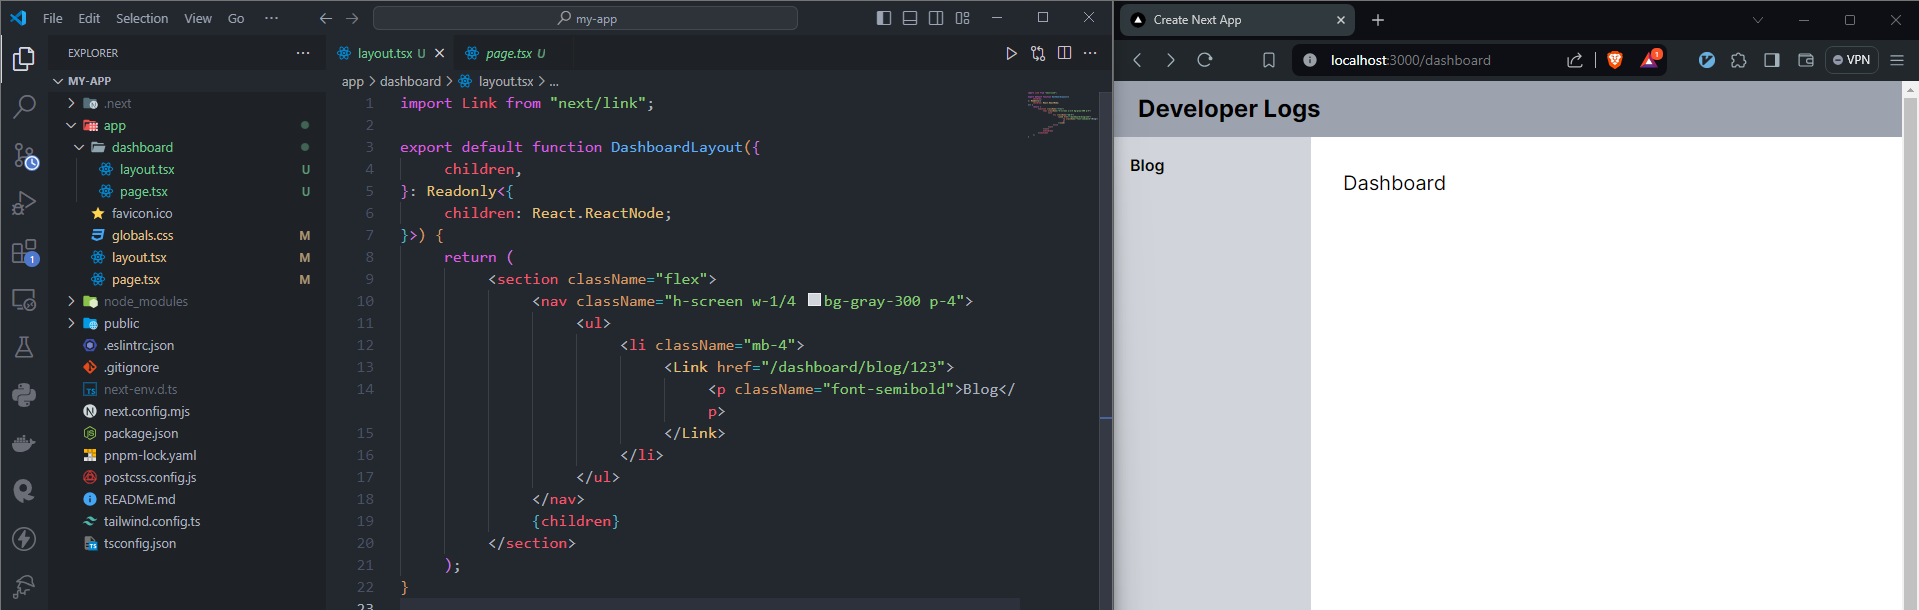
Now you can see the top navbar coming from the root layout and the sidebar shared across the /dashboard route.
let's create a dynamic route for the Blog section in the dashboard folder and see.
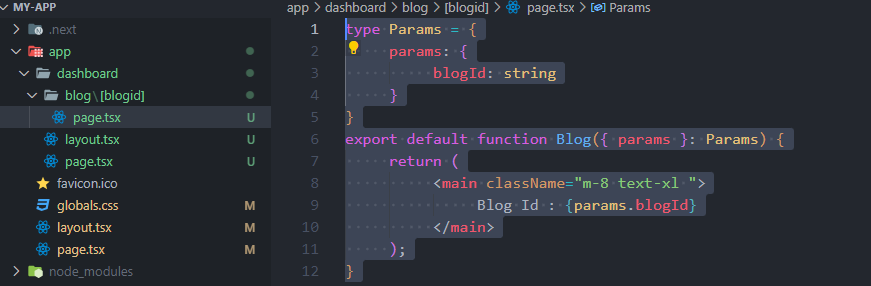
In the dashboard folder, I have created one more folder blog, and inside the blog folder, I have created a dynamic route [blogid]. So, the final url will be /dashboard/blog/123. Here 123 is the blogid. If we want to access the blogid value we have to use params props.
type Params = {
     params: {
          blogid: string
     }
}
export default function Blog({ params }: Params) {
     return (
          <main className="m-8 text-xl ">
               Blog Id : {params.blogid}
          </main>
     );
}
after clicking the blog link in the sidebar, you will see the dynamic route content with a shared navbar and sidebar.

This is a brief overview of how file-based routing works in Nextjs. Now, let's dive into organizing a large codebase that could have multiple routes in Nextjs.
3. Organizing a large codebase in Nextjs
Consider, that we're building an app with different parts like a landing page, a dashboard, payment stuff, and an authentication system. There are many routes, folders, and files that need to be organized. Instead of scattering them all over the codebase, it's crucial to put them in order. By establishing a logical structure where each feature's folders and files are manageable, readability and understanding for other developers will be greatly improved.
Consider that we need 3 routes, for the landing page (/home, /service, /contact) and 3 routes, for the dashboard (/overview, /analytics, /settings). We want to organize all the landing pages and dashboard routes together in separate folders for better management. However, creating a folder in the app router immediately treats it as a route. To tackle this issue, we utilize Next.js's group routes feature. With this feature, we can create group routes in the app directory using the (folder) convention. These are known as organizational folders. Organizational folders, or group routes, don't impact the actual routing, allowing us to organize similar routes in one place.
Let's create group routes and their corresponding routes in the app directory
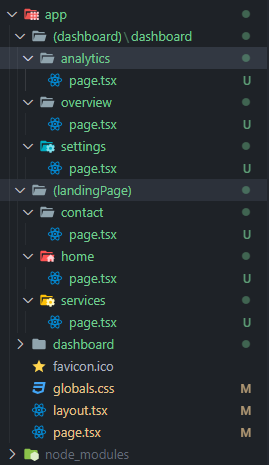
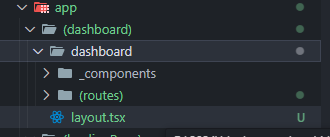
Our app directory has two group routes: (landingPage) and (dashboard). Under (landingPage), there are 3 routes (/home, /service, /contact). Similarly, under (dashboard), I have created an additional folder named 'dashboard', and within it, there are 3 routes (/overview, /analytics, /settings). This additional folder within (dashboard) is necessary so that all the dashboard routes follow the /dashboard path, such as /dashboard/overview, /dashboard/analytics, /dashboard/settings.
To organize the components based on their usage within the codebase, we need two component folders: one that is shared across the entire app, and another that is shared only within a specific route group. Having different levels of component folders serves the purpose of organizing components based on their scope of usage within the codebase.
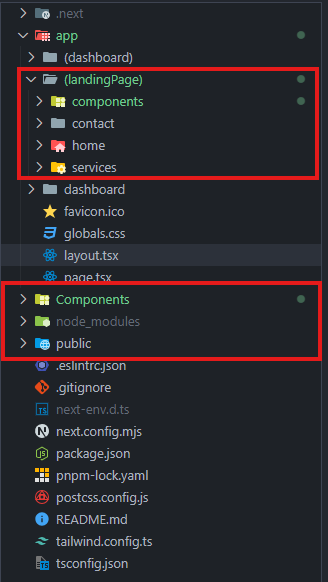
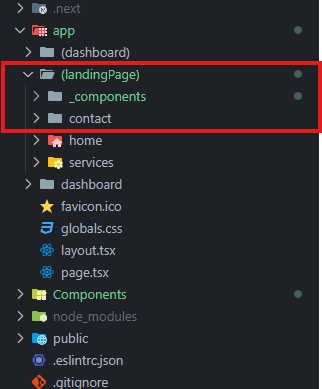
In the image above, you can see that I've created a top-level 'Components' folder, intended for shared components across the entire app. Additionally, I've created another folder within the (landingPage) group route, specifically for shared components across the landing page. However, there's an issue: the component folders under the (landingPage) working as a route, which is not correct. To resolve this, we'll utilize the Next.js private folder convention. We have to simply rename the 'components' folder and add an underscore prefix '_components'. This private folder ('_components' ) prevents the folder and its child folders from being included in the routing. Now the final code will look like this -
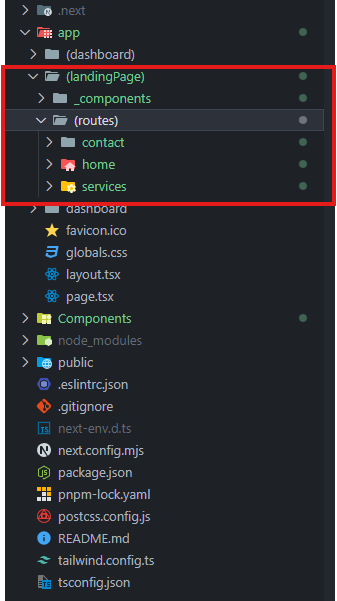
Let's do a little bit more refactoring in the landing page. Let's create a route group under the landing page and move all the routes into that group so we can better distinguish between private folders and routes.
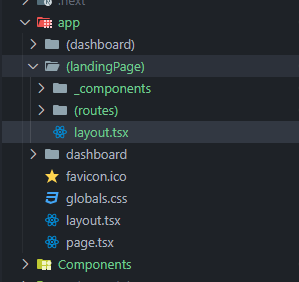
We can add custom layout in the route group that will work on that route group only
You can also do the same things in the (dashboard) group route.
If you have custom hooks and other utilities, you can create top-level folders in the codebase and put all the related files in there.
Conclusion
Now that you understand how routing, group routes, and private folders work in Next.js, you're ready to apply these concepts in your next project.
This approach is highly opinionated, and you might have a different approach. I would love to hear about it in the comments!
Github Repo - https://github.com/husainasfak/next-js-project-structure
Reference - https://nextjs.org/docs/getting-started/project-structure

